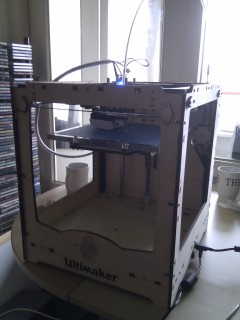
Networked Ultimaker with Raspberry Pi (on linux)
August 04, 2012 at 10:06 PM | categories: 3d printing, raspberry pi, ultimaker
I got my Raspberry Pi yesterday!
Installation of the provided Debian image is a breeze (just make sure you have an SD card and a micro-USB cable lying around). And I am happily playing with it right now.
I didn't have a real Plan to use it yet, so in the meantime I'm using it to control my Ultimaker over a network; Due to physical constraints, I have my printer in the same room as my main desktop system, but out of reach for any sane USB cable. I have a laptop sitting right next to it to control it now, and I am thinking of getting an Ulticontroller.
But the laptop is slow, and I want to at least be able to send prints from my main machine to the Ultimaker. Also, should I get rid of the laptop, I have more room to stuff tools and prints. It's getting a bit messy.
So, Use 1 for the Raspberry Pi was born!
Originally I was thinking of writing a fake serial driver, that passed on all data to a fake serial client, running on the Pi, but it turns out that isn't even necessary; we can use the socat tool.
I have not fully fleshed out all details yet, and there are some current problems, but I thought I'd share.
Basic steps:
- Install socat on client and on raspberry pi
- Connect Raspberry to network
- Connect Raspberry to Ultimaker
- On raspberry, run:
socat -d tcp-listen:<some port>,fork /dev/ttyACM0,raw,echo=0,b<your Ultimaker firmware baudrate>
- On client machine, run:
socat -d PTY,link=~/ttyACM0,raw,echo=1,wait-slave tcp:<IP address of raspberry>:<same port as previous command>
(I used port 12346 for no reason at all)
Go to your controller tool (e.g. PrintRun), and set the port to ~/ttyACM1.
And start printing!
Well, not exactly. While the above works with PrintRun, it does not with Cura.
Cura appears to have a fixed set of possible ports (I can't edit the field), so we'll have to use one of the standard names. This presents us with a problem, since in order to use, for instance /dev/ttyACM0, we'll need to run socat as root. And if we run socat as root, our client (which we will certainly not run as root), can't connect.
A quick workaround is to change ownership of /dev/ttyACM0 once socat is running;
sudo socat -d PTY,link=/dev/ttyACM0,raw,echo=1,wait-slave tcp:192.168.8.24:12346
chown <your username> /dev/ttyACM0
I suspect there may be some option within socat for this, but I have not looked for it yet.
Obviously, this also 'opens' your printer to your entire network. You can also do it without the listening side, though, but you probably want to set up ssh-keys first, so you do not need to enter a password every time. Once you have, you can use something like:
 socat PTY,link=~/ttyACM0,raw,echo=1,wait-slave EXEC:'"ssh \
 pi@<IP address of raspberry> socat - /dev/ttyACM0,nonblock,raw,echo=0,\
 b<your Ultimaker firmware baudrate>"'
There are more issues:
- The socat instances can quit, in which case you need to run them again, so at this point it is not a fire-and-forget kind of initialization.
- I have no idea what will happen if you plug in something that might initialize a serial port itself. I hope socat is nice in registering itself (so the tty will not be assigned to something else), but I have not tried this out.
- You may not want to do this over a flaky WiFi connection.
Anyway, I'm using this to print out a case for my raspberry right now. Let's see how it goes!
Ultimaker
August 04, 2012 at 01:26 PM | categories: 3d printing, ultimaker
So a while ago, I got myself an Ultimaker
And while I do not want to degrade the usefullness by calling it a toy, I would like to say
Best. Toy. Ever.
It uses a printing technique called FFF, which I guess is just another term for FDM, which builds an object by depositing plastic one layer at a time.
It is sold as a kit, and it took me two evenings (and part of a night) to build. Ever since then I have been happily making little things with it.
You do have to realize that it is quite the DIY project; for the Ultimaker kit you do not need to do any soldering, but don't expect perfect prints straightaway; 3d-printing itself has a learning curve, and you'll be tweaking and playing around with your machine to improve it as well.
I'd estimate that I spend about half the time fixing, calibrating, and improving the machine itself, and half the time actually printing other things. I love it, but before you go out and get one for yourself, you do have to realize this.
But that is one of the great things about these 3d-printers; you can print improvements for your printer as well. Or even entire new printers (without the electronics, obviously).
For instance, I've printed
- several forms of belt tensioners
- a tube holder for the hot-end
- a handle to carry the Ultimaker around
- a new fan duct for the hot-end
But also a lot of non-ultimaker things;
- the infamous geared heart
- a nice little decorative dragon
- a dock for my phone
- presents for people :)
The ultimaker is pretty actively worked on, both by Ultimaking inc. itself, and by its community; for instance, recently a lot of work has been put into improving the filament feed mechanism, and currently people are looking at better ways to build the hot-end.
For things to print, Thingiverse is a great resource. I regularly check it to see what to print next.

